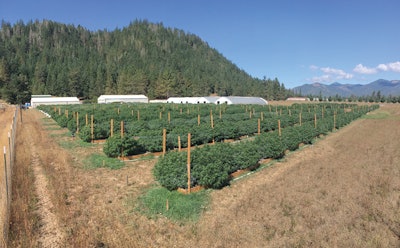
Maximizing yield is crucial to your commercial cultivation success. While trial and error is one path, it’s not the only option. Among the industry’s most valuable resources are experienced growers willing to share their expertise. Cannabis Business Times reached out to several commercial cultivators for these top tips—from indoor growers and those who use vertical farming, to greenhouse and outdoor farmers—to help you get the most out of your harvest.

Kevin Biernacki, Director of Cultivation, The Grove, Las Vegas, Nev.
1. Start with Good, Fresh, Healthy Genetics
“The most important thing, on top of everything, is genetics. There are so many genetics out there right now, and the last thing you want is plants that are starting to have some form of genetic drift.
“What we do is bring in [a] first run of seeds. Then … we’ll find the phenotype that’s doing its best and then employ that phenotype into a room where we test it … before we put it into full production. It’s a matter of slowly finding those genetics that really work for you.”
2. Maintain a Comfortable Environment for the Plant and the Genetics You’re Growing
“A key component to a vertical grow is having really good, solid air circulation to maintain your environment more precisely. That said, because heat rises and cold sinks, we find that inevitably, you’re still going to get a slightly warmer upper level and a slightly cooler lower level. So we try to adjust our genetics based on that.
“If we have a genetic that’s more prone to liking high heat, we’ll put it at the top. If we have a genetic that maybe is prone to more coloring, maybe it turns a lot more purple [at a cooler temperature], we’ll put that strain toward the bottom. Because we can make the bottom colder than the top, that allows us … to adjust the temperature for that strain because it likes to change color with that temperature.”
“The other thing we do with a vertical component is-because you’re working on strains at a second level, on maybe a ... lift or a stairwell-try to put our strains that need the least amount of attention on the top, and the strains that are stretchy and need more attention and … manicuring on the bottom. The bottom plants always tend to get love, and the top plants always tend to get a little neglect.”
3. Group Strains with Similar Requirements
“In the commercial environment, you’re kind of pushed to grow a multitude of strains. We try to group our strains that finish at the same time and prefer the same environment. So, if we have eight strains that finish roughly at the same time and have the same nutrient requirements, we group those so that we have one room that maintains that environment all the time without having to change that for different strains.”

Brook Eagle, Director of Operations, Golden State Networking/GSN Consulting, San Jose, Calif.
4. Maximize Your Canopy
“You want to maintain as full a canopy as possible. The best way to do that is to use netting to weave your plants or ‘scrog’ [screen of green] all the plants to fill every square within that net. To help create that uniformity and the same size stretching and plant height within that canopy, I pinch the tops when the plants are young. By pinching the tops instead of cutting the top off, you allow the plant to keep its main branch while encouraging the side branching to become unilateral with the top, and you don’t stress the plant quite as much. What I’m going for when I pinch is to get at least four to six tops that are all uniform before I flip my plant into flower.
“Within the canopy, to help maximize the light penetration, you want to de-leaf your plants somewhere around the end of Week 1 into Week 2 of flower, and that will allow the light penetration to go deeper into the plant, giving you bigger buds and creating a thicker canopy of flower.”
5. Hit Plants with Well-Timed, Extra Phosphorus
“Around the end of Week 1 of flower, I hit my plants with a little bit of extra phosphorus. I do this in just two feedings, usually Day 8 of flower and around Day 13 of flower. By adding this extra [phosphorus], it sends a signal to the plant to produce the bud sites a little bit quicker, and it prevents the plants from stretching quite as much.”
6. Boost Yields with CO2
“Most cultivators know CO2 does boost your yields up. I recommend running somewhere around 1,250 to 1,350 ppm steadily throughout flower, increasing it from Week 1 to Week 7 or so. So maybe you start out at 1,000 ppm Week 1 and then ramp it up to about 1,350 or 1,400 max by Week 6 or Week 7. For the last week, I drop my CO2 down to about 1,000 again to help produce more trichomes. CO2 allows the plant to photosynthesize faster and eat up more nutrients. You’ll find more and denser trichome production and resin production when you’re using CO2.”
7. Incorporate a Silica Product in Your Nutrients
“Using a silica in your nutrients to about Week 4 or Week 5 of flower will not only help your plant deal with stress better, but it’ll give you stronger stalks, which allow you to get stronger flowers. It also helps in the uptake of nutrients. I recommend monosilic products.”

William Hill, Owner/Grower, William’s Wonder Farms, Applegate Valley, Southern Ore.
8. Choose the Right Strains for Your Environment
“We have great growing conditions for sun-grown cannabis. It’s a very long season. We can plant May 1 for the most part, and we can keep stuff out [into November]. We don’t have a lot of humidity toward the end, not a lot of rain, so we can do a large variety of strains.
“Go north, and they have to put out June 1, and the freezes start early. They need strains that will finish earlier—late September or early October—because the rains hit, or it starts getting foggy and you run the risk of mold. Pick the wrong strains, and you have to cut them down early, and then you’re losing your yield.”
9. Maximize Your Root Zone

“The bigger your root zone, the bigger the plant. The bigger the plant, the bigger your yield.
“I’m a Tier 2 outdoor [cultivator], so I’m allowed 40,000 square feet of flowering canopy. In the past, I did rows 200 feet long and 10 feet wide, spacing 20 plants per row in 400-gallon pots. I want them to fully utilize their space.
“This year, I tried boxes. They’re 5 feet wide by 200 feet long, so it’s one continuous bed, and I added more plants. I definitely like the beds—it’s a bigger root zone. ... With the beds, the roots can just go and go, so I have a bigger root zone and a bigger yield.”
10. Don’t Cut Corners When Building Your Foundation
“Set a good foundation for success with quality soil and amendments. For me, being a farmer is kind of like building a house—you want a good foundation. Cut corners and it shows with your end product or your end yields.
“Quality soil and good amendments are essential to maximizing yields. Create a healthy root zone with all the right nutrients, not lacking anything. Then the plant is healthy from Day 1 until the time of harvest.”

Matt LaScala, Head of Cultivation, HUXTON, Metro Phoenix, Ariz.
11. Buy a PAR Meter and Start Using It
“PAR represents photosynthetically active radiation—the light that’s specific to the plant spectrum, as opposed to the visible light spectrum. Seeing light the way your plants do is vital to optimizing growth at each stage and maximizing yields.
“Take light readings everywhere, and map that light space. Understand the PAR output on different fixtures in your environments, so you completely understand what that plant is experiencing. Once you start developing a map and a PAR chart, and graphing that information, then you can start to anticipate vigor, nutrient requirements and so forth.

“If you can afford it, I recommend a PAR meter with data-logging capacity. You can put that PAR meter on a table and let it run for as much memory as it has. So you can capture a day, a month or a whole flower cycle. That’s very useful. Then it’s taking data points for you and can give you standard deviations.”
12. Check Nutrient Solubility Regularly
“Every time you introduce a new ingredient—or a new batch of ingredients—do a spot check. Just put a small amount of the material in a cup. Add some … cold water and hot water. See how it gets into solution and how it behaves; then let it sit. If it falls out of solution or if it needs agitation, those are good things to understand. You could be giving your plants what they need based on tissue tests, but if it’s falling out of solution, it might as well be going down the drain.
“Understand the effect pH has on nutrient availability. Get a nutrient chart and look at the solubility of the different macro and micronutrients, and see how they behave under different pH conditions. Understand how those solubility levels change with different pH environments—then that’s applicable to hydro, to soil, outdoor, anywhere.
“Cannabis is not a monoculture. …. Every strain is its own crop. You need to be looking at each strain individually to maximize your pH for performance from that strain. The better notes you keep, the better off you’ll be. Create a plan for every strain.”
13. Calibrate Your Meters Regularly
“Meters are only as good as their last calibration. Keep calibration standards on hand and use them often. I would calibrate meters daily and make sure that you’re following the guidelines for the meter calibration and the calibration standards … to the letter. It’s not limited just to your water meters and your pH meters. Calibrate your PAR meters, and keep up on calibration of anything that’s going to provide data that you’re going to use for decision making.”

Steven Walser, President and Co-Owner, Buddy Boy Farm, Eastern Washington State
14. Know What Your Market Needs Are and Grow Accordingly
“The first thing you have to know is what you’re going to sell [your product] for. If you’re just going for maximum tonnage and not necessarily trying to get highest grade possible, where looks are at a premium, then you grow one way. If you’re growing for extraction, for example, that’s what you want. If you’re growing for what I call fresh pack or flower packaging, then you want to grow differently.
“In our greenhouses, we’re growing for flower production specifically … for the highest-quality look and THC that we can. We’re very extensively training the plants in order to maximize the number of buds that are exposed to the sun or the light.
“Basically, we trellis. When the plant gets about knee-high, we put the first trellis on and start to train the branches wide, out to the side. We spread that plant out. When it comes up about another foot, we put another trellis on it in order to be able to continue training it out … to where our rows are completely filled from front-to-back and side-to-side, with branches coming up every 3 to 4 inches in every direction. You do that by spreading the plants and pinching off the tops when they’re young, so they branch out into multiple branches.”
15. Be Prepared for Harvest
“If you’re new at this, make sure you’ve thought about how you’re going to harvest. If you’re an outdoor grower, you’ve got an immense amount of material that’s ready in a short time. You’ve got to process it and have it dried, and there’s more coming. You’ve only got a narrow window before inclement weather or frost or whatever sets in.
“Greenhouses are different. For us, we have basically a 60-day turnaround on a flowering greenhouse. We both set out and harvest a different greenhouse every week. On our rotation, about every five and a half to six days, we can bring a greenhouse down. So you’ve got a constant flow of harvested material, and you just have to be sized for that weekly harvest to be able to process that before the next one comes through.”
16. Be Prepared for Pests
“In an indoor or greenhouse environment, you will get them one way or another. Some of them are very difficult to deal with without using very toxic sprays. We’re all organic in that regard, so we’re very careful about what we use. We’ve developed some proprietary things we do that we feel give us an advantage in the market, but I will say we use a lot of predators. It’s not cheap … but that’s just the cost of doing business.”


