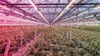
Automating irrigation improves productivity and plant quality in two ways: First, it improves plant quality by making irrigation more uniform; second, it reduces the amount of time your team must spend hand-watering the crops, creating more opportunities for staff training and development. Chances are your team will have time to perform more plant-care tasks. Instead of dragging a hose around, they now will be checking for equipment malfunctions, inspecting root systerms and repairing, leaks that could lead to slippery algae build-up and fungus gnats.
If you’re contemplating automating your irrigation, here are 24 pointers to help you do it right.
1. Speak the Same Language
It’s time to drop vague irrigation language and start using terminology that is clear and similar to the verbiage in trade articles and scientific reports. Regarding irrigation programming, duration is how long an irrigation system applies the solution. Interval is the amount of time between those irrigation events. Leachate is the excess water that flows out of a pot’s drainage holes. Leach fraction is the ratio of how much leachate drains over the total amount applied—20-percent drainage is a common recommendation to keep fertilizer salts from accumulating in the substrate. Rather than a pot needing to be “flooded” or “soaked”—vague terms that can be defined differently by different people—a pot that is irrigated to saturation and allowed to drain is referred to as being at container capacity, synonymous with the agriculture term for moisture status of field capacity.
2. Start Cheap
You don’t need thousands of dollars to automate irrigation. A $40 battery timer works without any other equipment. Place it between your spigot and the hose that feeds your dripper system or sprinklers, and select duration and interval on the dials. Make it a habit to change the batteries the first of each month, instead of waiting for them to go dead.
3.Upgrade to Commercial Stand-Alone Controllers for More Features
By stand-alone, I mean a controller that is not integrated with your environmental controller. These units start at roughly $120. The controller will allow you to irrigate multiple crops independently and provide flexibility for day of week, operation times and alarming. These controllers require electronic solenoids (open/close valves) that are sold separately and start at around $25 each. They can be tricky to program, so laminate the instructions and keep them near the controller.
4. Consider Building Your Own Arduino Controller
A few years ago, under the direction of Dr. Marc van Iersel at the University of Georgia, I built a portable, stand-alone micro-processor controller for about $140. It could be integrated with up to 16 soil-moisture sensors and solenoids. The programming is open source. The possibilities go way beyond irrigation. Here is a link to van Iersel’s article on the subject: bit.ly/open-source-controller.
5. For Optimal Growth, Use Irrigation Programming in Your Environmental Control System
This is one of the more sophisticated automation options, as irrigation can be triggered based on time, light intensity, light accumulation or vapor pressure deficit (VPD). Furthermore, soil-moisture sensors or scales can be integrated into the system to trigger irrigation based on direct plant measurement. One advantage of this direct method is that the programming requires few adjustments as the crop ages. Additionally, logging soil-moisture data or pot weight provides the opportunity to learn from and fine-tune the system, and to set alarms when plants are too dry due to equipment malfunction.
6. Experiment With Micro-Pulses of Irrigation
With direct plant measurements, irrigation duration can be set to just a few seconds, while being triggered to start potentially dozens of times per day. This allows the soil moisture to be held at a certain level for optimization or for inducing controlled stress. Fertilizer salts typically don’t accumulate since the micro-pulses are not adding large amounts of nutrient salts, as opposed to when watering is performed to achieve container capacity. This method also can significantly reduce water and fertilizer waste.
7. Consider That Chemical Composition of a Plant May Be Altered by Inducing Controlled Stress
Through reports in scientific literature and from my own studies, I’ve observed that secondary plant metabolites can be altered by inducing stresses—among them, water stress.
8. Be Aware That Multiple Variables Can Be Used for Triggering Irrigation
For example, when I program irrigation based on daily light integral (DLI)—or light accumulation—I also program a maximum interval of, say, 72 hours. After that period has elapsed, the irrigation is triggered even if the DLI wasn’t reached. This is because a root substrate dries through evaporation even if the weather is cloudy. However, by using a third layer of programming, this irrigation would not occur within two hours of sunset, so as not to increase humidity at dusk.
9. Insist Your Team Checks the Plants as Often as Before the Automation
Following crop automation, it’s human nature for staffs to think that they are no longer responsible for proper irrigation because someone else set up the system. Ideally, your team should be involved in the system installation and activation, either by turning them on or having a say in the programming.
10. Learn How to Turn Pots Over to Examine Root Systems
This is impossible in situations with large pots or undeveloped root systems, but otherwise it should be something you and your team do every time you evaluate a crop. It will indicate if the pot is reaching container capacity and if all areas of the root ball are being saturated. You can check if the roots are white and healthy. Examining roots will also indicate if fertilizer salts have accumulated, as the top layer of substrate will be void of roots.
11. Protect Against Accidental Tampering
If you have an automated system supplied by a water spigot, set the flow and then remove the spigot handle so no one accidentally turns off the water.
12. Provide Visual Checks So Your Team Can Catch Malfunctions
Place a dripper in a graduated beaker so your team can confirm how much water was distributed at last irrigation. Add dye to your fertilizer solution so that they can also tell if the fertilizer injector is working.
13. Use the Right Tools, and Keep Them Handy
Reduce the number of steps it takes to find tools to repair leaks. I like to distribute cheap sets of basic hand tools around the facility. I also carry a multi-tool. Keep spare drippers, plugs and hose clamps near the system. Rather than a screwdriver, use a hex driver to tighten hose clamps to prevent slipping and jabbing your hand.
14. Secure Drippers in the Pots
It’s surprising how often a weighted drip emitter will vibrate out of a pot. Drip stakes are great for preventing this, but are harder to visually check if they are running, compared to emitters. I have used landscape fabric staples to pin emitters into the soil. Stake sprayers work well if they aren’t spraying outside the pot rim.15. Prevent Channeling of Irrigation Flow
If the pot is larger than 6 inches (15 cm) in diameter, you will probably need an emitter on two sides of the pot to prevent water channeling down just one side of the substrate. Drip rings assemble around the plant stem and have multiple holes, but they pull out of the poly-pipe more frequently.
16. Split Your Irrigation Event with a 5-Minute Pause
If you are using computer control, split the duration in half and program a five-minute pause in between. If you know your crop requires two minutes of irrigation, program one minute on, five minutes off, and another minute on. This will reduce channeling and waste, as it allows time for lateral movement of the moisture in the root substrate. You might even discover that you can reduce the total duration.
17. Add a Flush Valve to Your Dripper Line
To reduce scale and biofilm inside your dripper lines, install a cheap on-off finger valve on the end of the feeder line rather than a plug. Twice a month, flush the line for five to 10 seconds during an irrigation event.
18. Don’t Let Pots Sit in Water
If you are sub-irrigating via an automated ebb-and-flood tray, don’t let the plants stand for more than 30 minutes in water, including fill and drain time. This can lead to anaerobic conditions conducive to root disease.
19. Reduce Fertilization of Ebb and Flood
Your fertilizer rate can be halved in these ebb-and-flood (or flow) systems, and soil monitoring is even more important to prevent fertilizer-salt accumulation.
20. Consider a Top Dressing for Ebb-and-Flood Pots
Soils in these systems stay wet much longer and notoriously accumulate fungus gnats and shore flies. A half-inch deep top dressing of calcined clay granules such as Turface MVP can reduce or eliminate this by staying dry and blocking light from the soil surface. Keep a couple pots uncovered if you use surface color as an indicator of when to water.
21. Know Your Threads
Teach your team the difference between pipe thread and hose thread, or leaks will abound.
22. Keep Spare Parts Handy
There is nothing better than the feeling of being able to quickly make a repair on a Friday at 5:30 p.m. because you kept a labeled set of hardware drawers full of each kind of irrigation fitting you have ever used in the facility.
23. Formally Scout for Pests More Often
With an automated irrigation system, your team won’t spend as much time mindlessly holding a hose amongst the crop. While overall this is positive, less time with the crops means the team won’t have the same opportunities as before to notice hot spots of insects or pests. Design a system that mandates regular checks for pests and insects.
24. Validate Benefits in Pest Control to Management
Automating watering reduces insects and diseases by reducing foot traffic through the crop and by preventing wet leaves. Confirm this in your scouting. Managers/owners/stakeholders love multiple benefits from a single investment.