Sponsored by BIOS Lighting
Lighting is often one of the biggest struggles for cannabis growers, since energy use drives a major part of the grow’s cost. Just as in the light spectrum, there’s a range of different choices to work with, but for Bruce Bugbee, professor of crop physiology at Utah State University, one of the main reasons to pick LED lights is focus.
“It’s more focused light. If you put in any other kind of light, it spreads it out,” he says. A grower can use a reflector with other types of lights, like a high-pressure sodium (HPS) lamp to narrow that range, but they usually prefer to spread out that efficiency over as much of the grow as possible, he says.
“And that’s OK, as long as you have a big expanse of plants that you’re trying to light up,” says Bugbee. “But if the light goes off on the side, and it doesn’t hit the plants, it’s completely wasted.”
LED lights, on the other hand, narrow that spread to what’s important: The grow. They can be arranged to just light up the plants, while avoiding shedding energy on the aisles and walls. Even if the walls and floor reflect the light back onto the plants, it’s less efficient than the direct light that an LED provides for the plant, he says.
“When you bring in LEDs, they are like spotlights,” says Bugbee. “They focus the light right in one place.”
Installing or making a transition to LED lighting can seem a little daunting at first, though, due to a higher up-front cost, sometimes as much as two to three times as an HPS system, says Ryan Ryall, founder and horticultural lighting consultant at lighting integration group Ryall Grow. For a typical grow with three flower rooms and a veg room totaling about 5,300 square feet, he installs 192 lights for a total of about $317,000.
To offset that total, he’s always sure to include an estimated length of time before the system pays for itself. For a retrofit situation, making the change can deliver a return on investment usually at about the two-year mark, he says, and new construction can turn it around in about six to nine months.
Even with that goal in the distance, it’s a good idea to start small, he says.
“It’s a large up-front investment, and it hasn’t been around long enough to be absolutely proven. Before a cultivator, especially in a commercial production environment, wants to take on a new technology, they want to test and try it,” says Ryall. “Usually one table, meaning it’s a 4-by-4 or a 4-by-8 or sometimes a little bit smaller with anywhere from one to six fixtures.”
A test table typically goes in the corner of an existing HPS production room, which has a few benefits, says Ryall. First, it lets growers get familiar with the lighting instead of a sudden change. Second, it gives them the chance to see the day-to-day progress of the plants, especially in relation to the HPS system.
After a few test periods, growers tend to expand the LED grow a little bit more, but still not into a full-facility change, he says. The expansion usually means a whole row, or an entire flower room. With a room to work with, the differences become even more distinct.
“If you can isolate LED in its own room and run it at the ideal temperature, which is a higher ambient air temperature than HPS, you see even more profound yield increases. It has to do with optimizing the leaf surface temperature where cannabis wants to be,” he says.
An isolated flower room gives a grow the chance to prepare for one of the next big differences with LED lighting, a lower overall temperature. An HPS light radiates heat within its light spectrum directly to the plant leaves, but LED lights don’t include that in their spectrum.
The actual temperature is very cultivar-dependent, but the ambient air temperature with LED lighting runs generally about 10 degrees cooler than other systems, says Ryall. Under HPS, growers aim for a 75-degree air temperature, which puts the leaf surface temperature at about 85 to 88 degrees. Since LED lighting runs cooler, he’s seen the best results by raising the ambient air temperature by about 10 degrees. Ryall likes to see that number at about 82-85 degrees, which will make a lot of growers “fall out of their chair,” he says. It might actually mean bringing the temperature of the grow area up a little to the best range for the plant.
“Once [the plants] get too cool, it affects transpiration, growth and morphology, nutrient uptake. It can even affect CO2 uptake,” says Ryall. When growers report to him that the plants are feeding less, it usually means that the room has gotten too cool. “It all has to do with keeping the leaf surface temperature the exact same on that plant under HPS as it is under LED, regulated for ambient air temperature.”
Where to Place Your Lights
Another major change is where those fixtures might be placed. With an HPS system, having the fixtures spread evenly throughout the grow gives the best chance for the plants to get enough light. But the narrow focus of LED lights means placement is important, says Bugbee. He’s seen them placed around the edge of the grow angled across the plants, or mounted directly over the benches.
“LEDs are so focused that people that work on them try to spread the light out, so they’re not like a laser,” says Bugbee.
Part of that is the height of the fixture above the plants, which is a place that Ryall sees many growers trip up. Because they’re used to a layout with a wider range of light, they won’t line them up with the plants themselves. Alternately, they’ll either hang the lights too high or too close to the plant, reducing its distribution of light. It’s important to understand the optimized height for the lights being installed and stick to it, he says.
Purchasing a light meter can also go a long way to getting the most out of an LED light installation, says Bugbee, but the right kind of meter is necessary to get an accurate read. A foot-candle meter can be easy to track down, but it only reads light that’s visible to the human eye.
“We see green light about 10 to 20 times better than blue or red light,” says Bugbee. “So you get blue and red LED … it looks dim. It’s not a very bright light, but in fact, for plants, it’s super bright.”
A photosynthetically active radiation (PAR) meter will give a more accurate reading of what the plants are seeing, and where there’s overlap or wasted light. A PAR meter can range in price from around $250 to $450. But if a grower is spending money on fertilizer and water, it only makes sense to effectively manage their most expensive input.
“For [some growers] it’s ‘No, my plants are growing OK.’ Yeah, but you’re paying for a lot of electricity, and you’re putting it on the aisle. Everybody who gets a light meter goes, ‘Wow, I had no idea all this light was going over here,’” says Bugbee.
LED lights also give options for colors for a broad spectrum of light, and many growers might think of pink LED lights as the best choice for chlorophyll absorption. But plants absorb lots of colors across the spectrum, including green, says Bugbee – red and blue lights are just the most efficient, so they get used often.
But working in a grow under pink lights makes it difficult to diagnose plants for insects or disease. When that becomes difficult, it’s easy to skip an inspection with a flashlight or headlamp every day, says Bugbee.
“You know the line, ‘The best fertilizer is the footsteps of the farmer’? You need the grower in there, watching his plants every day,” says Bugbee. “If you have purple lights, all of a sudden you’ve taken away one of your biggest tools.”
Adding a few white lights in with red and blue LEDs can go a long way toward making a grow look more normal, and the efficiency loss is only about 10 percent to 15 percent, says Bugbee, who notes, “I’ll take the reduction in efficiency any day, with the value of helping me see subtle changes in my plants.”
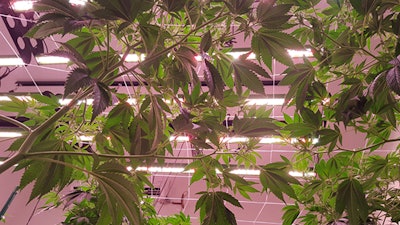
Editor's note: Image courtesy of Ryan Ryall.


